Programming & VFX
A short showcase of the compositing workflow.
Keying process
The keying process is handled in DaVinci Resolve Fusion. I start by reducing the noise to simplify the imige and the keying process., Then I generated a clean plate with the help of a blur node. That, alongside a polygon mask, feeds into the Delta Keyer node. A matte control node and color correction nodes then refine the final keyed image.
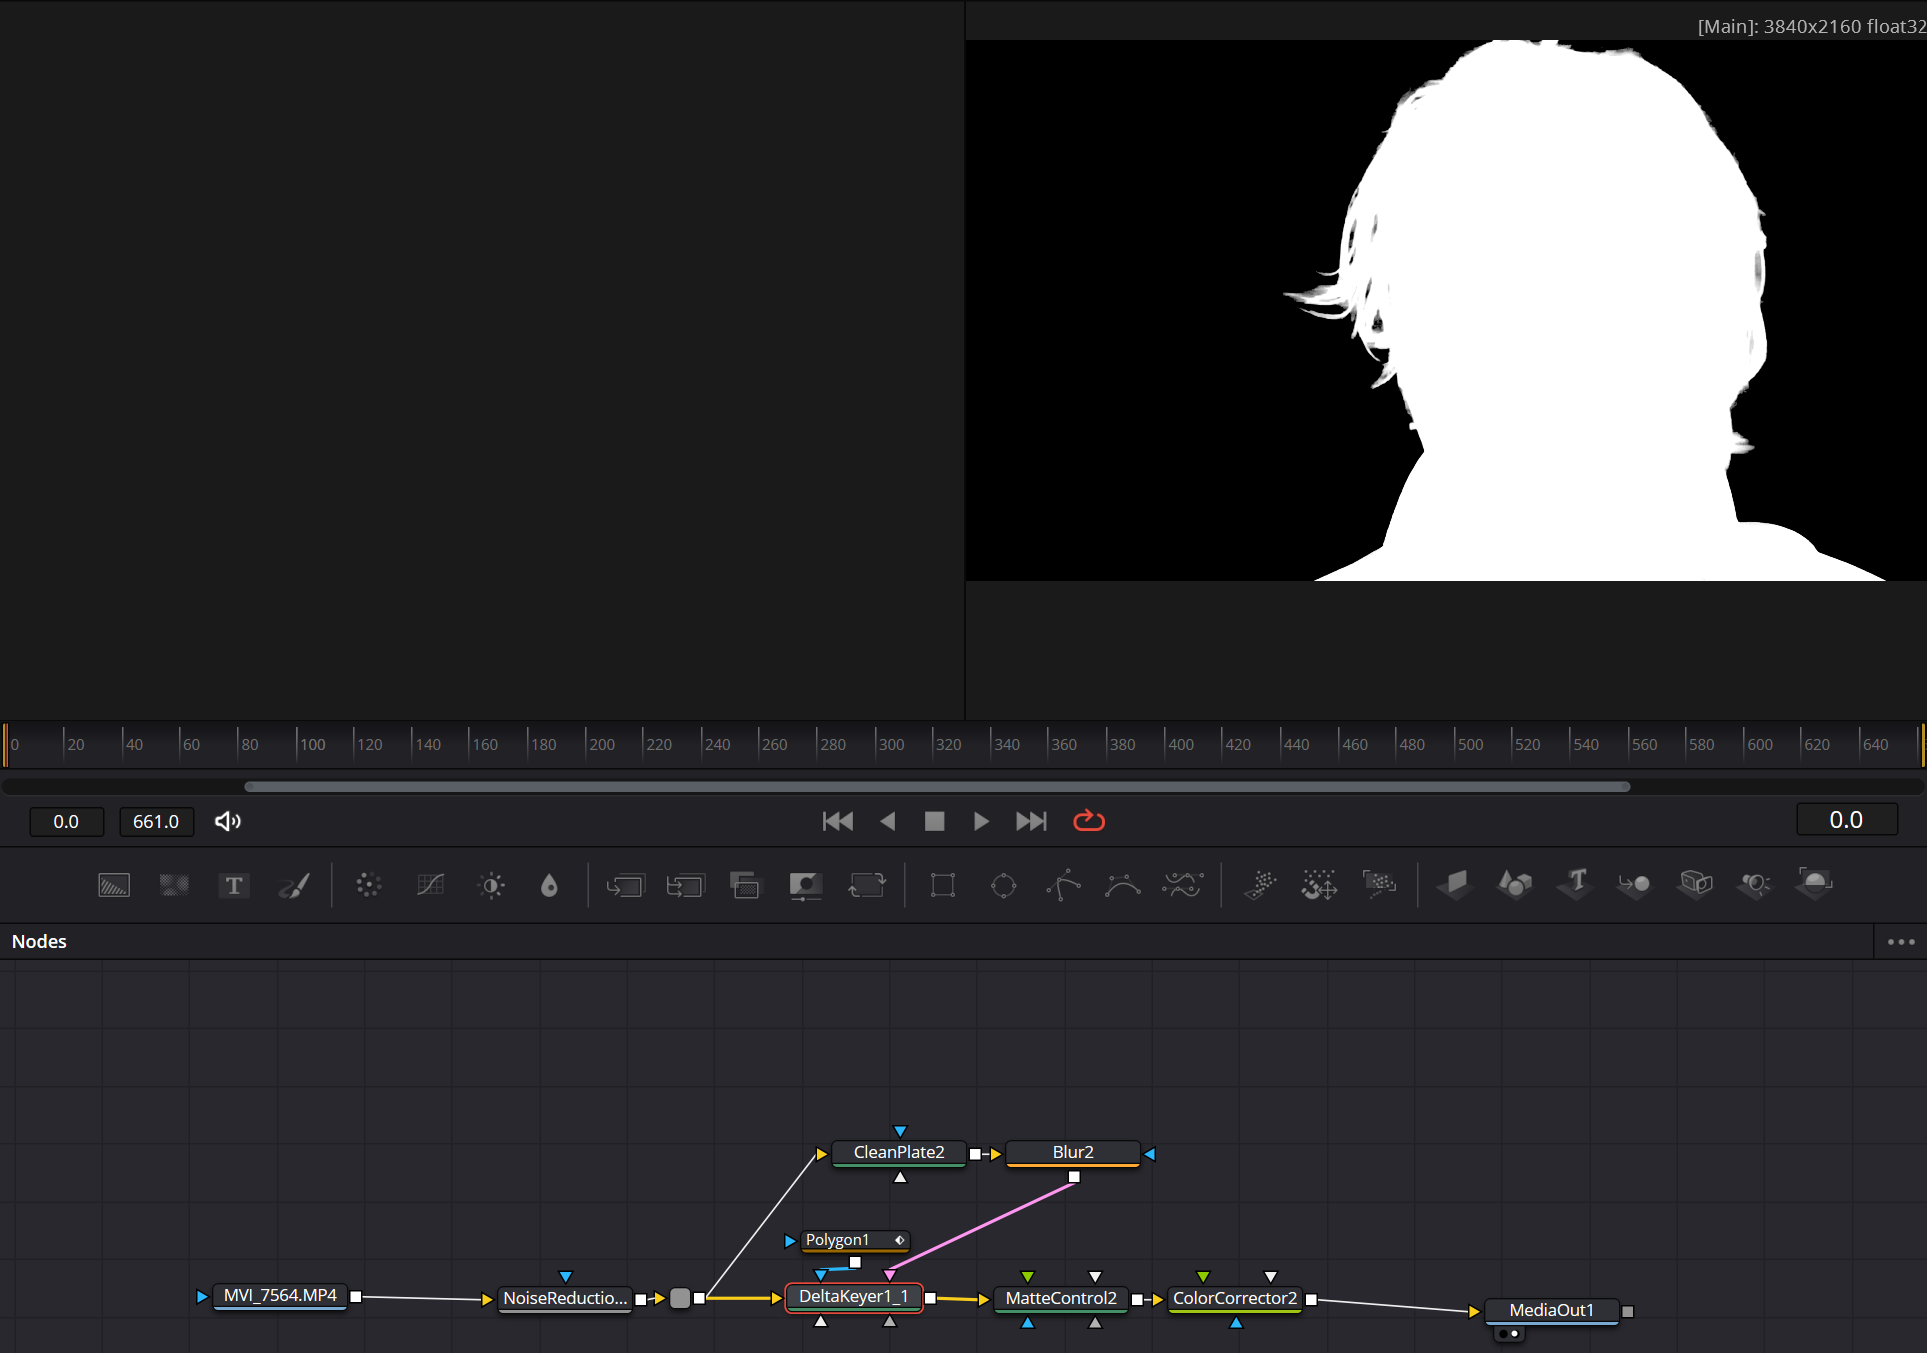
Once the footage is keyed, I render the footage to .tif with the alpha channel enabled so it can move cleanly into Blender.
Blender compositing
I used a car model from Blend Swap and paired it with background footage shot from a train window, which I downloaded from youtube (a side view footage from a car is surprisingly hard to find).
Next time, I could try using a 360° footage.
The keyed clip and background video are imported as planes inside the Blender scene with the car. The video shading setup is shown below.
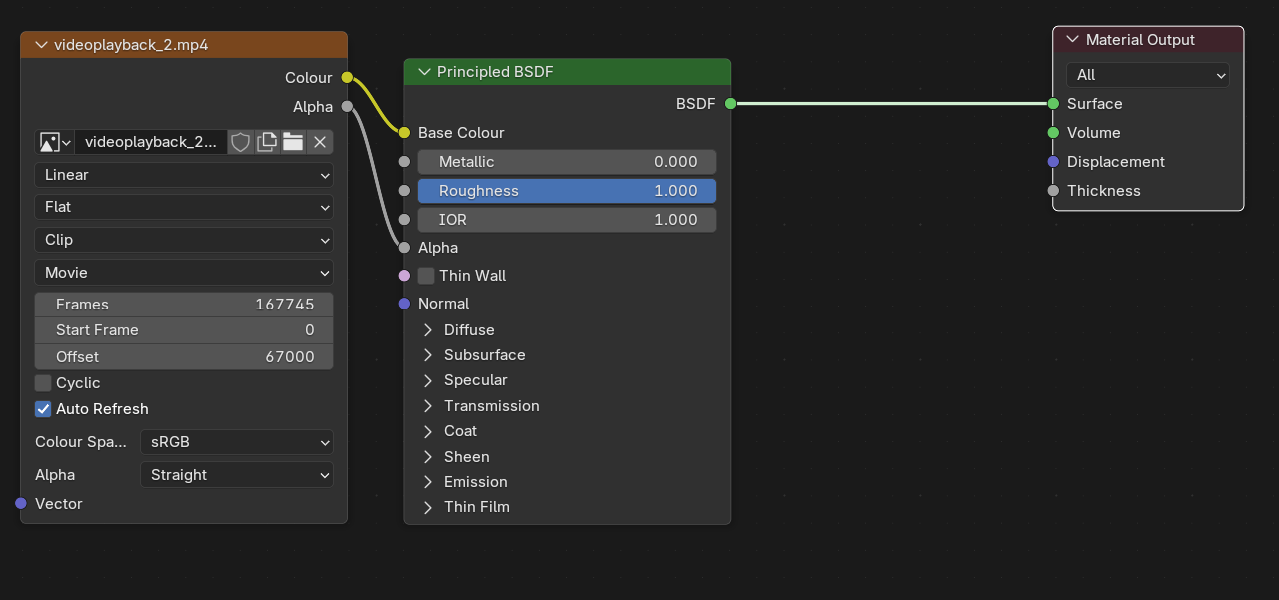
The planes are positioned in the scene to somewhat match their original perspective. Like showed in the pictures below.
Next time, I would like to try Unreal Engine's composite depth mesh actor to get around perspective issues.
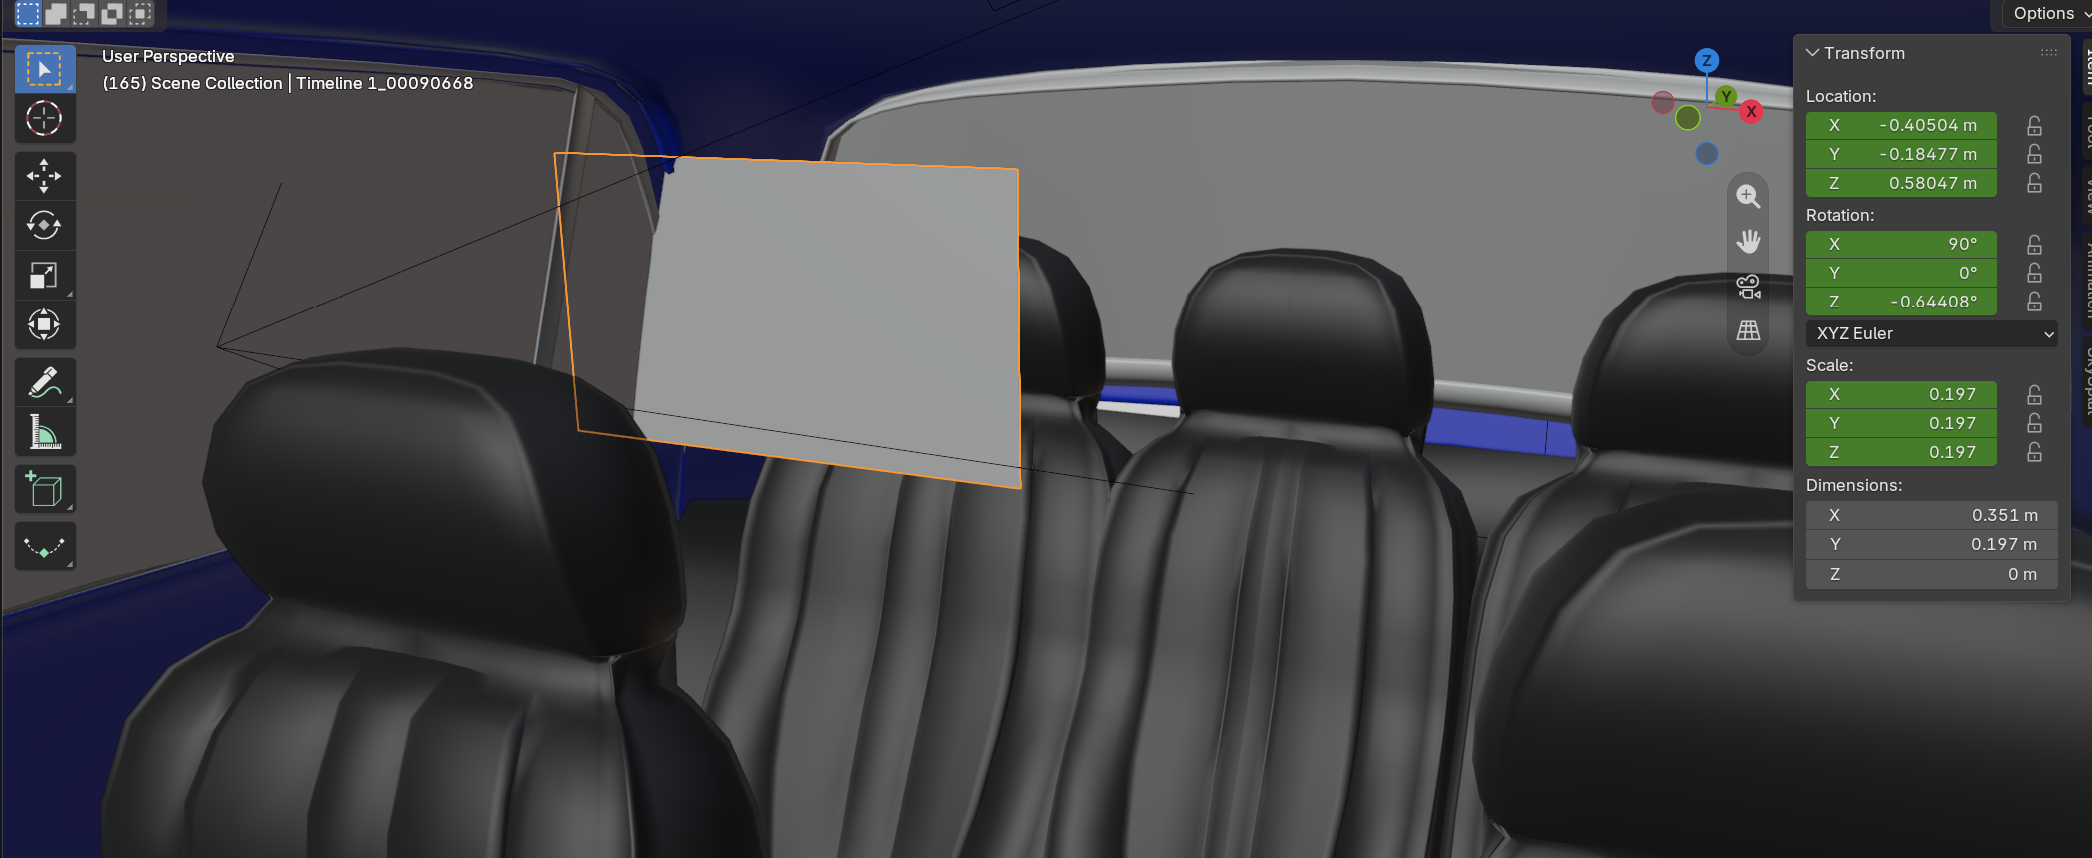
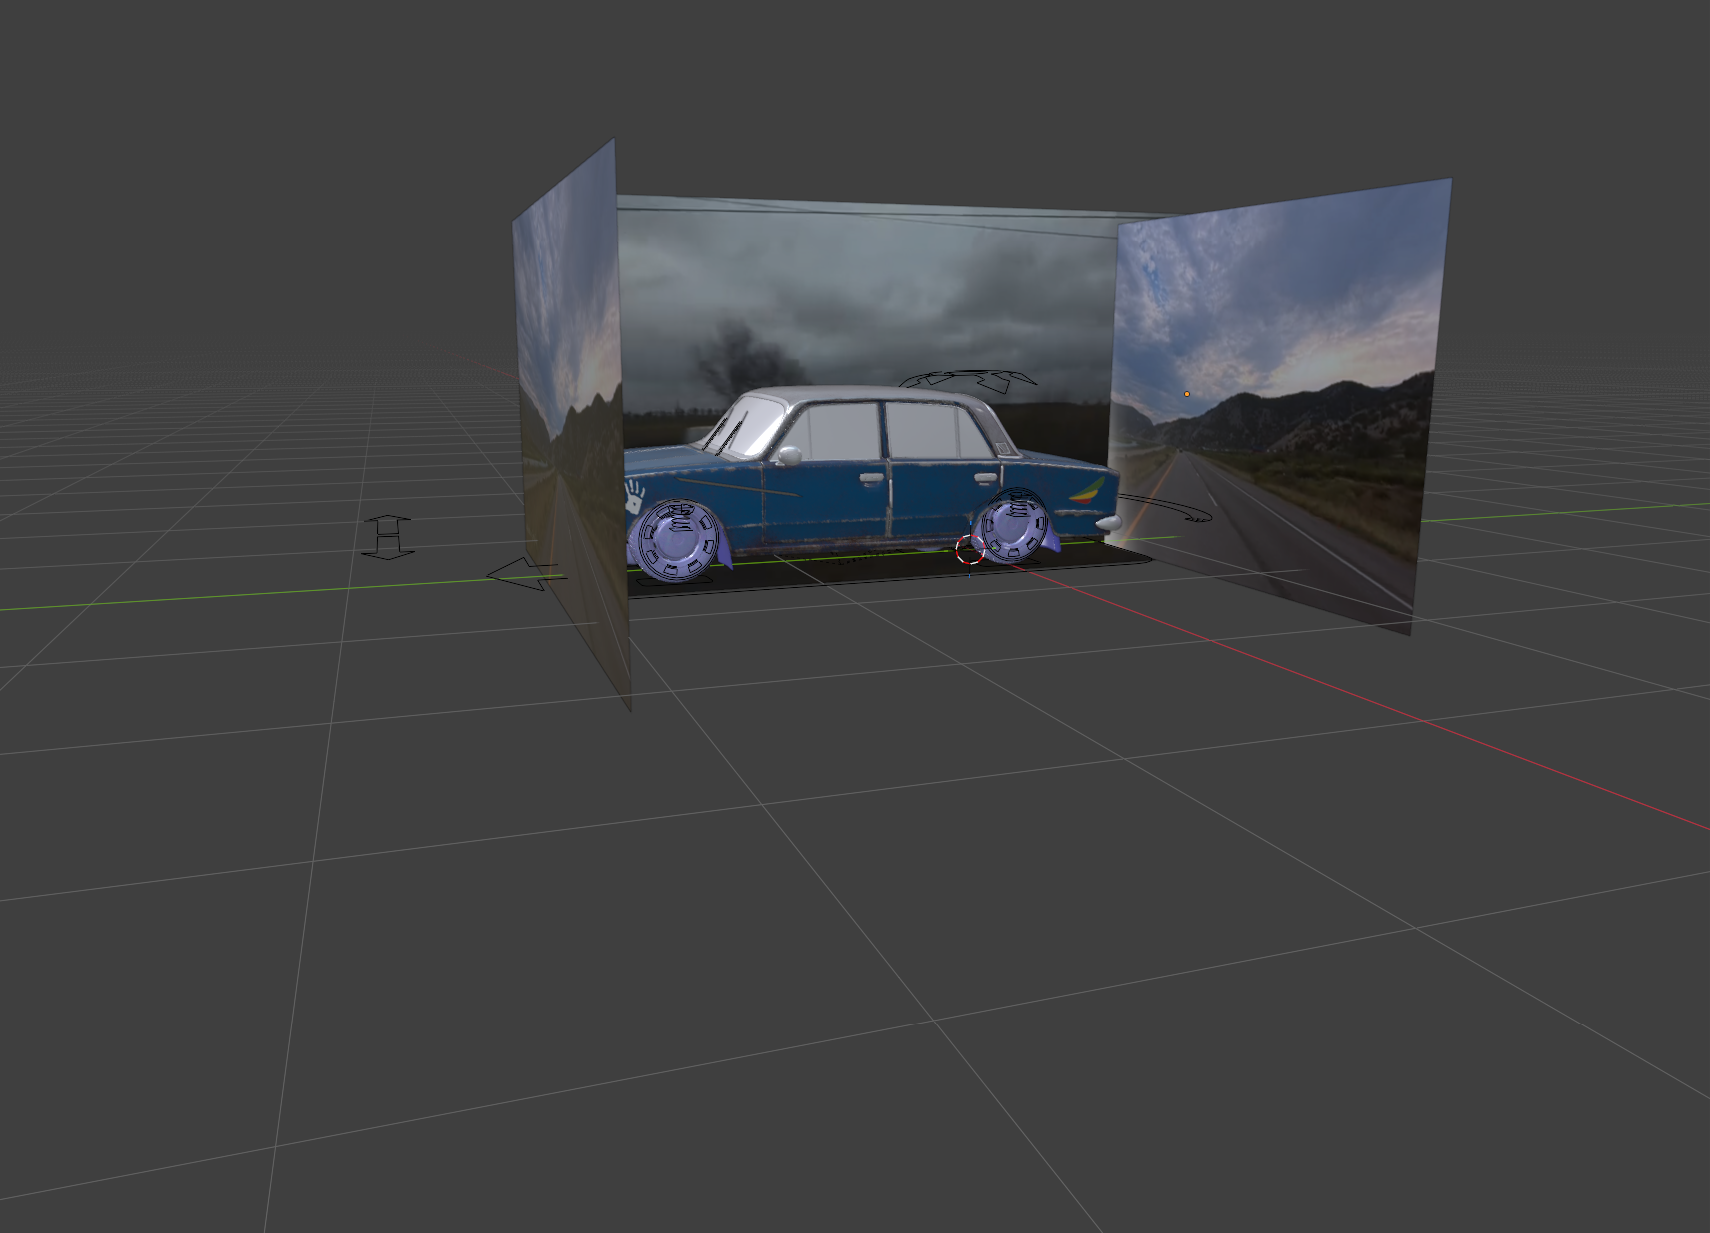
With the scene constructed, the last step is animating the car and camera, then rendering the final result in Blender Cycles.